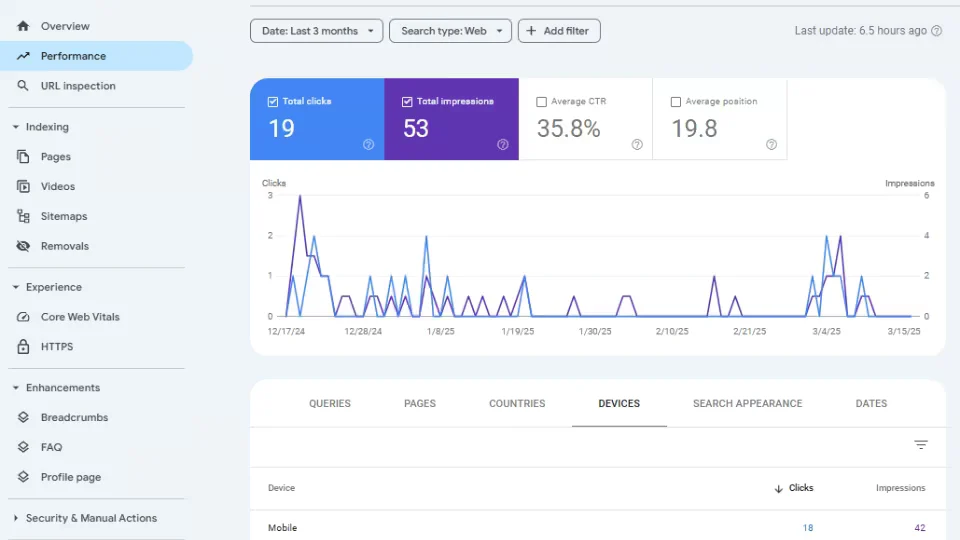
Imagine having a backstage pass to Google’s search engine—a tool that shows exactly how your website performs, what’s broken, and where to improve. That’s the Google Search Console (GSC). If you’re serious about Google SEO: Setup Google Search Console Tool for SEO, this free platform is non-negotiable.
Google SEO is not just about ranking higher—it’s about building a relationship between your website and Google’s search engine. By the end of this page, after following the step-by-step guide, you should learn how you can transforms your site’s organic search performance
But how exactly does GSC impact your site’s success? That is a right question to ask, now, let’s break down its core benefits.
Why Google SEO and Its Search Engine Console Tool are Important to Every Site Owner
The Google Search Console tool acts as a bridge, offering insights and tools that directly influence your site’s visibility. Here’s why integrating this tool into your SEO strategy is essential:
Indexing: Ensure Google Knows Your Content Exists
Without proper indexing, even the most valuable content remains invisible. The Google Search Console allows you to submit sitemaps or individual URLs, guiding Google to crawl new or updated pages efficiently. This step ensures your latest blog posts, product pages, or updates are recognized quickly, preventing them from getting lost in the vast digital landscape. Regular monitoring of index coverage reports helps you confirm which pages are live in search results and address any gaps.
Optimization: Turn Data into Action
Guessing which keywords drive traffic is a risky game. The Search Analytics feature within the tool reveals real data about the queries bringing users to your site. For instance, you might discover that a blog post ranks for terms you hadn’t targeted, giving you an opportunity to refine meta tags or create related content. This data-driven approach helps you allocate resources wisely, focusing on high-impact keywords and improving underperforming pages.
Problem-Solving: Stay Ahead of Issues
Crawl errors, security warnings, or mobile usability problems can silently harm your rankings. The Google Search Console tool sends email alerts the moment Google detects such issues, acting as an early warning system. With tools like the Coverage Report, you can identify broken pages or indexing errors, fix them promptly, and request a re-crawl. Addressing these problems quickly prevents minor hiccups from escalating into significant ranking drops.
Diagnostics: See Your Site Through Google’s Lens
The URL Inspection Tool removes the mystery behind why certain pages underperform. It provides a detailed snapshot of how Google crawls, indexes, and renders specific pages. If a page isn’t ranking, this tool reveals whether it’s due to crawl errors, indexing blocks, or mobile compatibility issues. This clarity allows you to troubleshoot effectively and ensure your site meets Google’s standards.
How to Register Your Site with Google Search Console Tool for SEO
Here are 7 steps to go about submitting your website on Google Search Console tool for SEO:
- Sign in to Google Search Console.
- Add your website as a property.
- Verify ownership of your site.
- Submit a sitemap.
- Use the URL Inspection Tool.
- Monitor coverage reports.
- Set up email alerts.
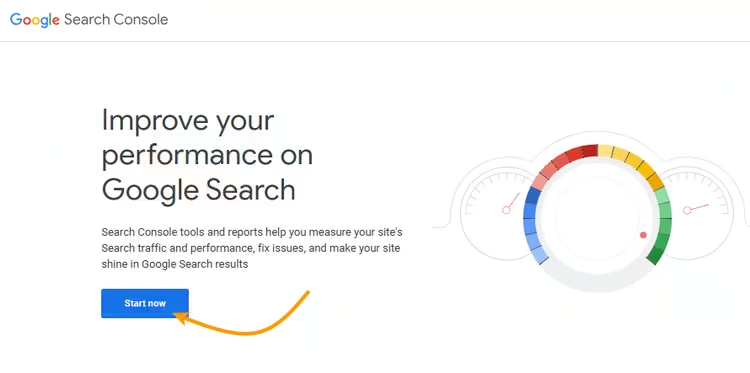
#1. Sign in to Google Search Console
Go to the Google search console page, click on the “Get started” button to redirect you to the login page.
Then select the Google email account to login with and input your password to complete the login process.
Please, note that there are more steps to login in, if you have extra login verification steps like 2Factor Authentication, SMS verification, etc.
#2. Add your website as a property
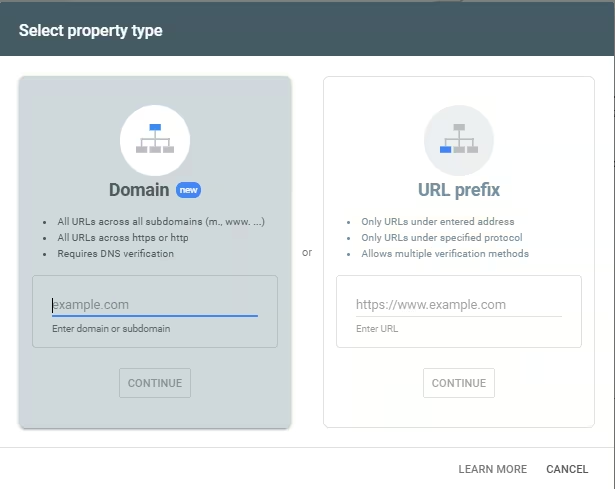
There are two property type options in Google Search Console, as shown in the image below: “Domain” and “URL prefix.”
Okay, let’s break down the two types of properties
| What It Covers | Domain Property | URL Prefix Property |
|---|---|---|
Domain Property covers all URLs across every subdomain and protocol under your main domain. This means it includes www.example.com, blog.example.com, shop.example.com, and so on, as well as both http:// and https:// versions of the domain. Verification for a Domain Property requires adding a DNS TXT record to your domain’s DNS settings. | A URL Prefix Property tracks only the URLs that start with the exact prefix you provide, including the protocol (http or https). For instance, if you enter https://www.example.com/blog/, only that subfolder and its sub-pages are tracked. Verification methods here are more flexible, allowing you to use an HTML file, meta tag, Google Analytics, Google Tag Manager, or DNS. | |
| Why and When to Use It: | You should use a Domain Property if you want a single, consolidated view of your entire website’s performance. This is especially useful for large or complex sites that span multiple subdomains or have multiple protocols (HTTP and HTTPS). It also simplifies future changes: if you add new subdomains or switch to HTTPS, you won’t need to create a new property. | You should use a URL Prefix Property when you want detailed tracking of a specific subfolder or subdomain. It’s also a good option if you don’t have DNS access and prefer to verify via an HTML file or meta tag. This granular approach is helpful if different teams manage different parts of a site and need separate performance reports. |
| How to use it: | 1. Select the “Domain” option. 2. Enter your root domain name in the text box. For example, example.com (don’t include www. or http(s)://). 3. Click “Continue”. 4. You’ll then need to verify ownership via DNS verification. Google will provide a DNS record (usually a TXT record) that you need to add to your domain’s DNS settings. This is typically done through your domain registrar (e.g., GoDaddy, Namecheap) or DNS provider (e.g., Cloudflare). | 1. Select the “URL prefix” option. 2. Enter the exact URL you want to track. For example, https://www.example.com. Make sure to include the https:// or http:// and the www. if it’s part of your primary URL. 3. Click “Continue”. 4. You’ll have several verification methods available: (a)HTML file upload (b) HTML tag (c) Google Analytics (d) Google Tag Manager (e) DNS record (CNAME or TXT record) |
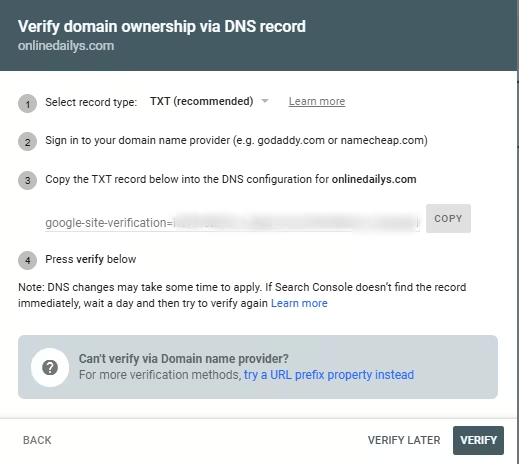
Domain Property Verification Interface
URL Prefix Property Verification Interface

#3. Verify ownership of your site
Select one of the properties you understood fairly, Google also provides guides for each verification process to follow and complete your ownership verification process. Click on the “Verify” button to complete and submit the form.
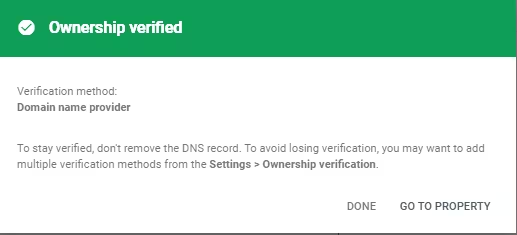
You should see a confirmation page like the above image, if everything was correctly done from your end.
#4. Submit your sitemap
Think of a sitemap as a roadmap or table of contents for your website, specifically designed for search engine crawlers like Googlebot, Bing, Yandex, and others understand your site’s structure and discover your content more efficiently. It’s an XML file that lists all the important pages (URLs) on your site, along with metadata about each page.
In other words, when you submit a sitemap, you’re essentially giving search engines a roadmap to your site. The search engine’s crawler then visits the sitemap file, follows each listed URL, and attempts to crawl and index the page.
Key Benefits of Having a Sitemap:
- Helps Google discover your content quickly.
- Improves crawl coverage of your website.
- Improves indexing processes by provide additional information about your pages, such as; when the page was last updated, how frequently the page changes, the page’s relative importance within your website, and other metadata that helps Google understand your content and index it appropriately.
- For news websites, a sitemap is essential to ensure the timely indexing of breaking news content, allowing it to appear in Google News.
Creating a Sitemap:
Manually (for small sites): If you have a very small website with only a few pages, you can manually create an XML sitemap using a text editor. This involves writing out each URL in the proper XML format, which can be time-consuming. While it might be feasible for very small sites, it’s generally not recommended for larger ones because of the extensive effort required to keep it updated.
Sitemap Generators: There are many online tools that can generate sitemaps for you—simply search for “XML sitemap generator.” These tools crawl your website, identify its pages, and automatically produce a sitemap file. You can then download the file and upload it to your website’s root directory or wherever your site’s files are hosted.
CMS Plugins: If you use a content management system (CMS) like WordPress, Joomla, or Drupal, there are plugins that handle sitemap creation and updates automatically. For WordPress, popular plugins include Yoast SEO, Rank Math, and All in One SEO Pack. These plugins are typically the easiest and most efficient way to manage generate and refresh sitemaps on your website whenever you add or edit content.
Custom Development: For more complex websites, a developer might need to build a custom sitemap generation system. This could involve writing scripts or integrating with existing systems to ensure your sitemap is always current, especially if your site has a large number of dynamic pages or a complex URL structure.
Submitting a Sitemap to Google Search Console
After completing the verification process (as shown in #3), click on “Go To Property” button to see your new Google Search Engine Console tool. Its now time to submit sitemaps, but before then, ensure that you have already completed “Creating a Sitemap” guide (as shown above) in your website.
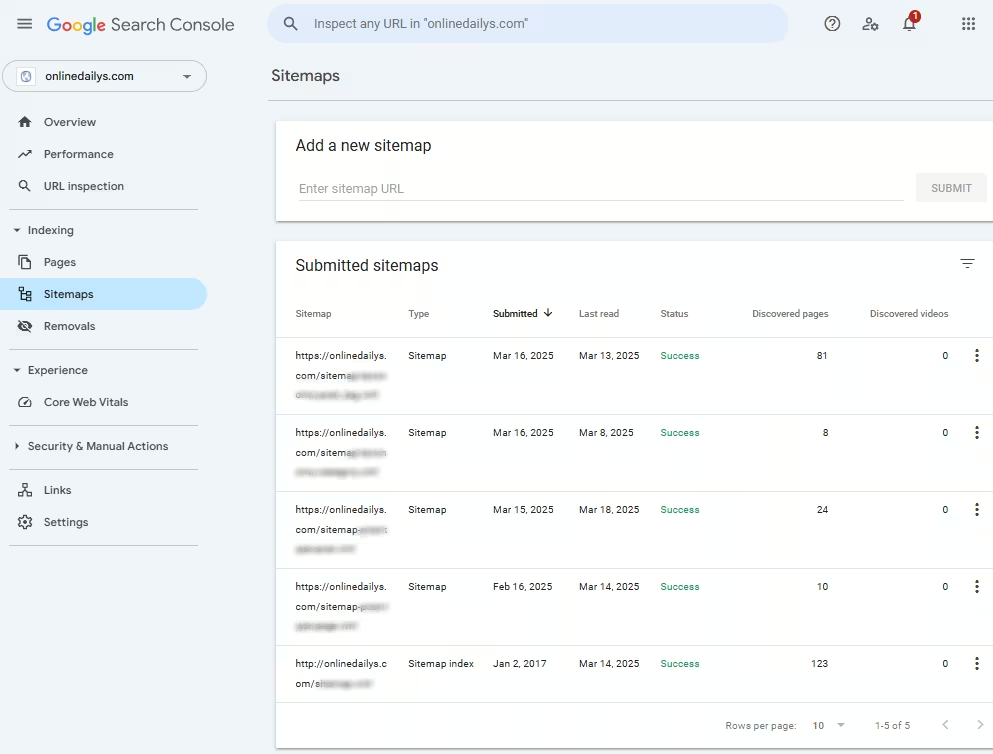
- Then, in the left-hand navigation menu, click on “Sitemaps” under the “Indexing” section.
- In the “Add a new sitemap” section, enter the URL of your sitemap file. Important: This is the full URL of your sitemap file, like https://www.example.com/sitemap.xml or https://www.example.com/sitemap_index.xml (more on sitemap indexes below). The Google Search Console knows about your domain, so often you just need to enter /sitemap.xml if it’s located in the root of your directory.
- Click the “Submit” button.
- Check Status: Google will crawl and process your sitemap. The “Submitted sitemaps” section will show a list of the sitemaps you’ve submitted, along with information such as:
- Sitemap: The URL of the submitted sitemap.
- Type: The type of sitemap (usually XML).
- Submitted: The date you submitted the sitemap.
- Last Read: The last time Google crawled the sitemap.
- Status: The status of the sitemap processing (e.g., “Success,” “Couldn’t fetch,” “Sitemap contains errors”). If you see errors, you’ll need to investigate and fix your sitemap file.
- Discovered Pages: The number of pages Google discovered in your sitemap.
- Discovered Videos: The number of videos Google discovered in your sitemap (if it’s a video sitemap).
#5. Use the URL Inspection Tool
The URL Inspection Tool another section within Google Search console, packed with powerful features. It allows you to get detailed information about how Google sees a specific URL on your website. It’s like a mini-audit for a single page.
Using the URL Inspection Tool allows you to:
- Identify Indexing Issues by determining if a page is indexed and why or why not.
- It also identifies Debug Crawling Issues, that is, if Google can access your page, fetch its content, and follow its links.
- Validate Mobile-Friendliness.
- Identifying and validating your schema markup and identify any errors that might be preventing rich snippets from appearing in search results.
- The “Test Live URL” button allows you to test the live version of the URL to see if Googlebot can access it. It gives you real-time information and is useful when troubleshooting crawling issues.
- Request Indexing
How to Access and Use the URL Inspection Tool
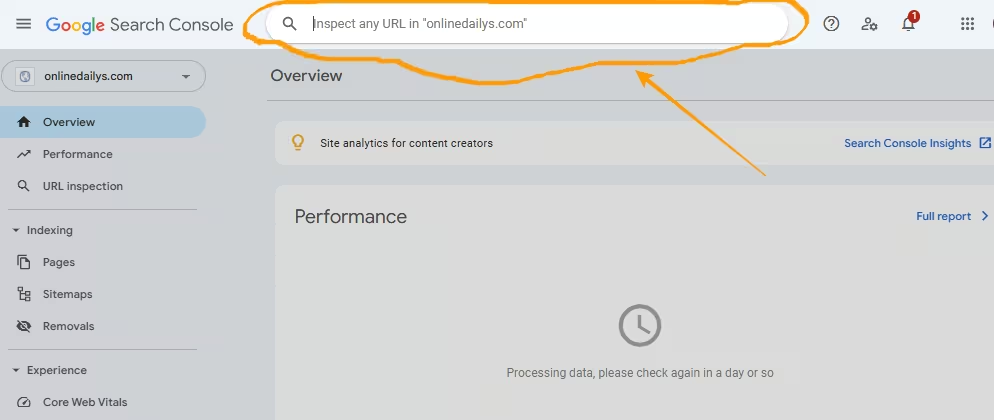
- In Google Search Console, by the left-hand navigation menu. You will see “URL inspection,”. Click on that.
- At the top of the page, you’ll see a search bar labeled “Inspect any URL in [your domain]”. Type or paste the complete URL you want to inspect into this search bar. For example, https://www.onlinedailys.com/some-specific-page/. Make sure you enter the exact URL, including https:// or http:// and the www. if applicable. After entering the URL, press Enter or click the magnifying glass icon or tap the Enter” button on your keyboard.
- The tool will retrieve data about the URL. This process might take a few seconds. It will provide information in a few key areas of your website.
In some cases it might come with some errors or warnings, including guides to get it resolved on your website. Or complete the No. 4 below to ensure that the error persisted, before going on to fix anything. - Click on the “TEST LIVE URL” to make an fresh crawling.
- Then click on “REQUEST INDEXING” button to complete the URL inspection process.
When to Use the URL Inspection Tool
- After publishing a new page: Check if Google can access and index your new content.
- After making changes to a page: See if Google has picked up the changes.
- When troubleshooting indexing issues: If a page is not ranking in search results, use the tool to see if it’s indexed and if there are any problems.
- When implementing structured data: Validate your schema markup to ensure it’s working correctly.
- When optimizing for mobile-friendliness: Check if your pages are mobile-friendly and address any issues.
#6. Monitor coverage reports
Coverage reports in Google Search Console are vital for understanding how Google crawls and indexes your website. They categorize pages into statuses like “Error,” “Valid with warnings,” “Valid,” and “Excluded,” providing insights into indexing issues, potential problems, and reasons for non-indexing. Monitoring these reports regularly helps identify and fix critical errors, improve overall indexing coverage, optimize canonicalization, and detect technical SEO issues, leading to better website structure and performance.
Effective monitoring involves checking reports frequently, prioritizing error fixes, investigating warnings and exclusions, and using the “Validate Fix” feature after making corrections. By combining coverage data with other GSC reports and Google Analytics, you can gain a holistic view of your website’s SEO health and track progress over time. Addressing findings, such as server errors or noindex tags, allows for targeted improvements that enhance search engine visibility and ensure proper crawling and indexing of your content.
#7. Set up email alerts
Setting up email alerts in Google Search Console allows you to receive immediate notifications about critical website issues that can impact your SEO performance. By enabling these alerts, you’ll be promptly informed of problems like sudden drops in organic traffic, indexing errors, security issues, or crawl anomalies, enabling you to take swift action to investigate and resolve them. This proactive approach ensures that you stay on top of your website’s health, minimize potential downtime, and maintain optimal visibility in search engine results.
In Summary
Google Search Console is a pivotal tool for SEO, empowering site owners to actively manage their organic search performance. More than just a problem-solving utility, it allows you to strategically influence how Google discovers and understands your content. From ensuring complete visibility and refining SEO strategies to maintaining technical website health, GSC is the bedrock of a sustainable SEO approach. Neglecting this tool cedes control of your site’s success, while embracing it places you firmly in the driver’s seat, enabling data-driven decisions and optimized search engine performance.